Displaying Map on the page
Once you complete the basic setup, allow the map to be added on page, post or custom post type. A new section will be added.
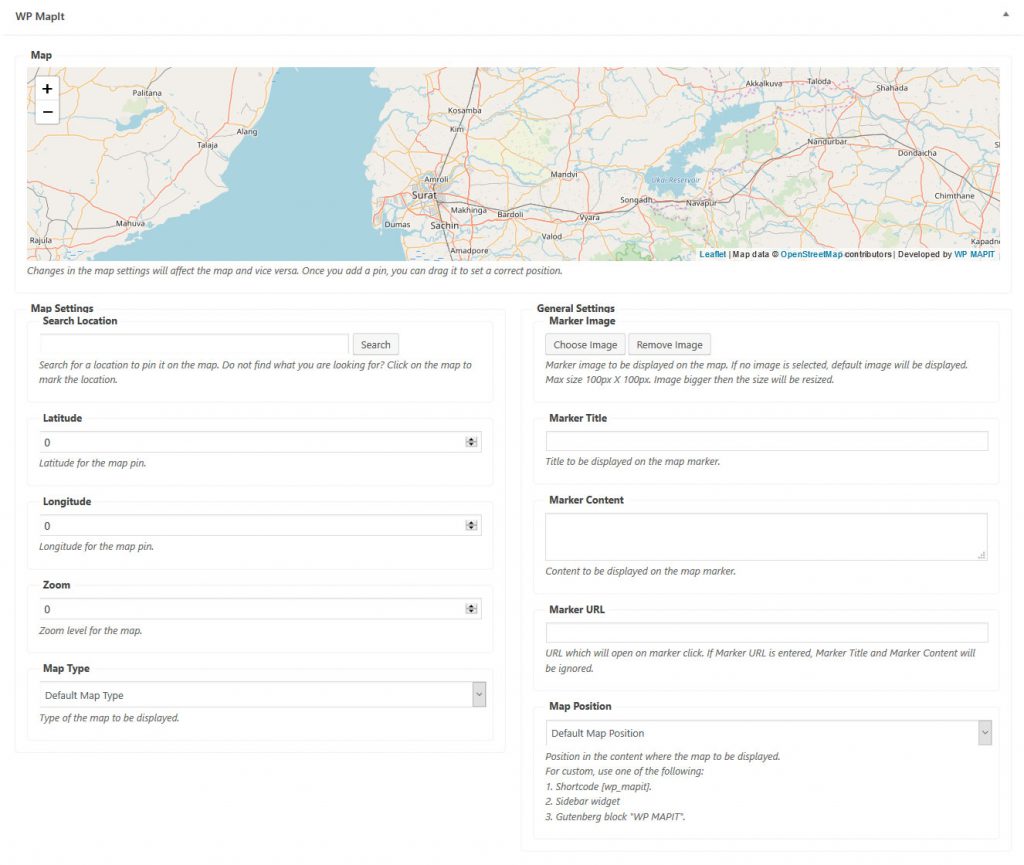
To display the map on the frontend, a map pin needs to be added.
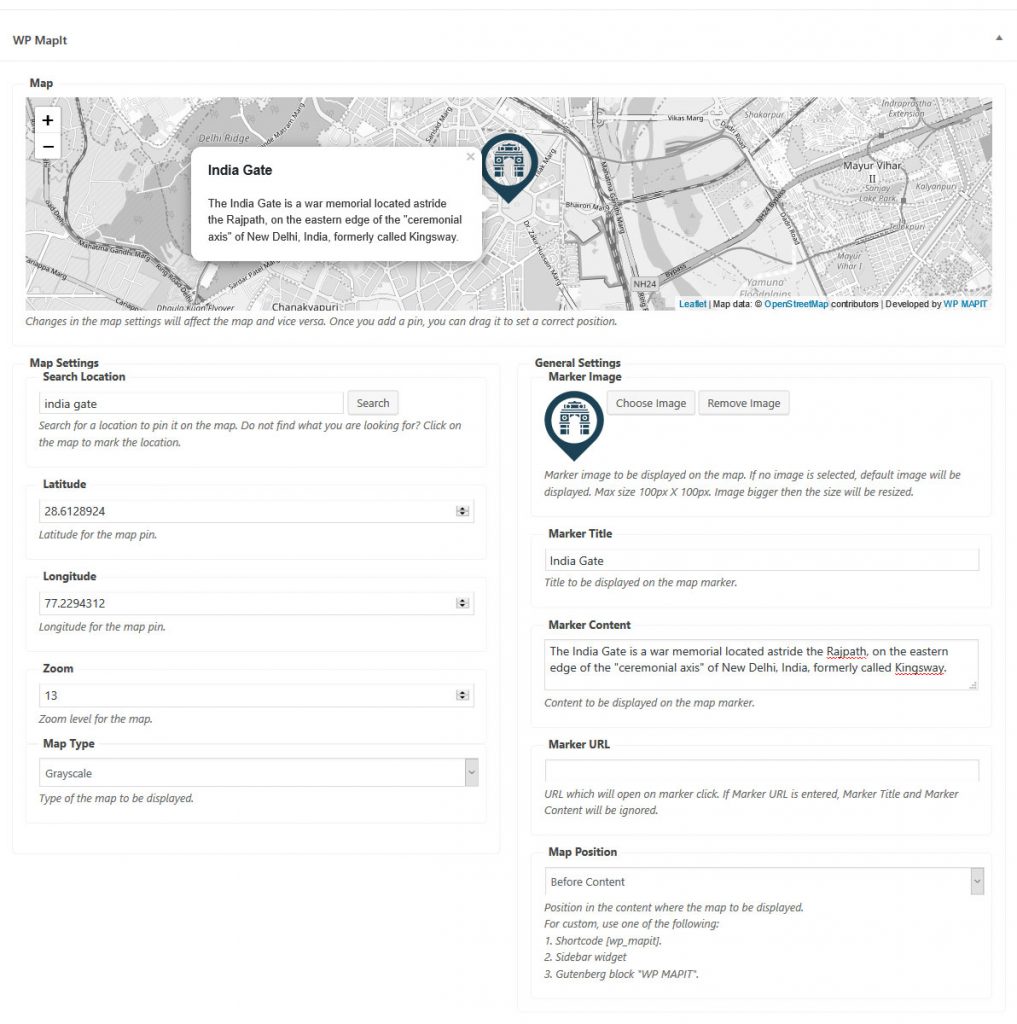
Adding Map Pin
Add a pin on the map by clicking on the map or searching a location.
Latitude and longitude can be added manually to set the map pin.
To set the correct location of the pin, drag the pin in the preview map.
Other Settings
If no values for the other settings are selected, the default values from the plugin settings will be used.
Map Type: Set the style of map that will be displayed.
Marker Image: Image used as a map pin.
Marker Title: Title to be displayed in the map marker popup.
Marker Content: Content to be displayed in the map marker popup.
Marker URL: URL to be opened when clicked on the marker. If the URL is entered, the URL will be opened when the marker is clicked instead of popup. “Marker Title” and “Marker Content” will be ignored in this case.
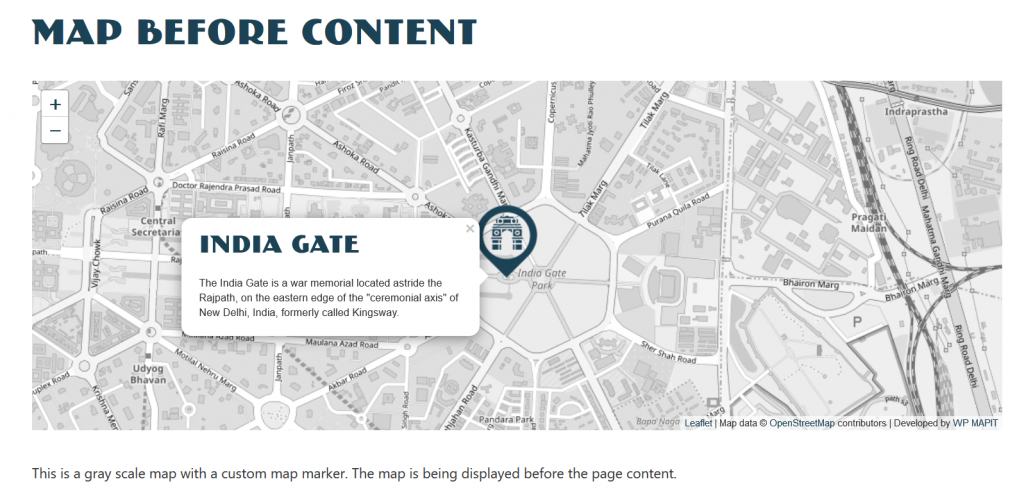
Map Position: Position where the map will be displayed on the page. Map can be displayed “Before Content”, “After Content” or at any “Custom” location on the page.
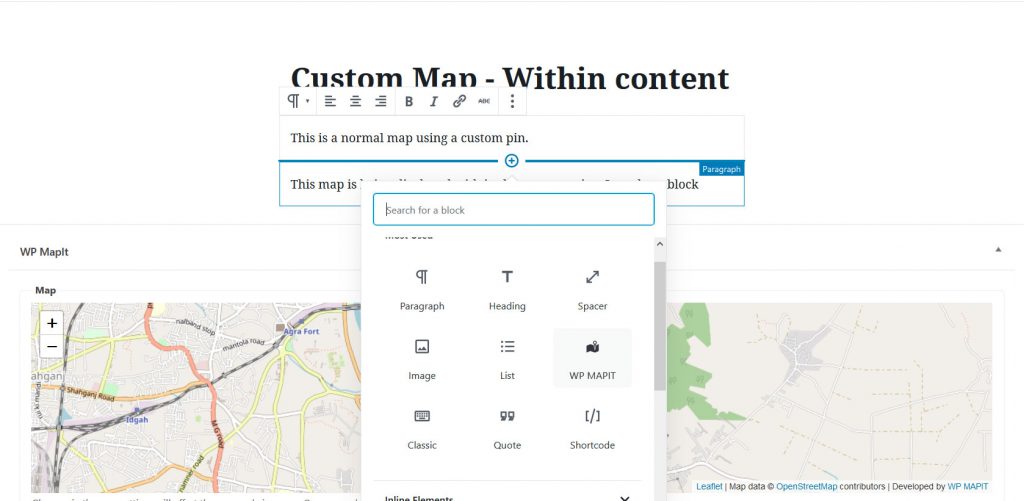
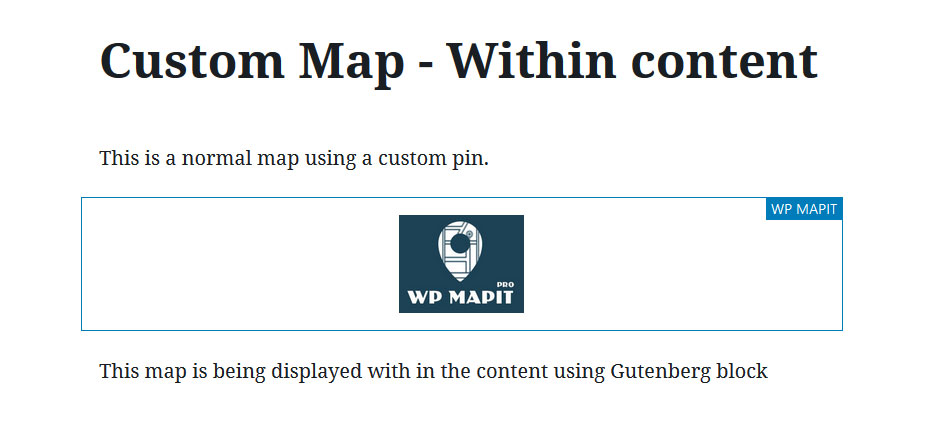
If “Custom” option is selected. Map can be added to the page using a Gutenberg block “WP MAPIT”
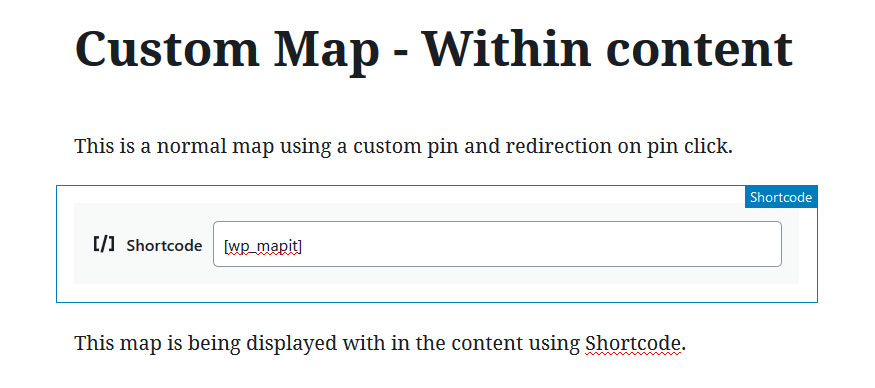
A shortcode “[ wp_mapit ]” (without space) can also be used to display the map.
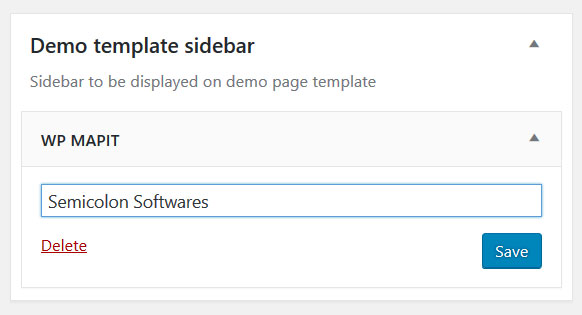
If you want to display the map in the sidebar instead of the page content, you can use the Widget “WP MAPIT”.
Preview of the settings can be seen on the map
Map displayed on the frontend
Demos
Custom map position within content
Custom map position in sidebar